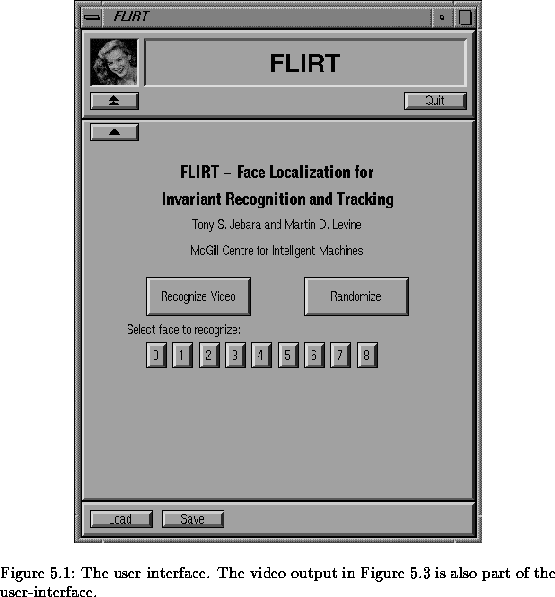
![[*]](http://vismod.www.media.mit.edu/vismod/support/latex2html-98//cross_ref_motif.gif) and its output window is shown in Figure
and its output window is shown in Figure ![[*]](http://vismod.www.media.mit.edu/vismod/support/latex2html-98//cross_ref_motif.gif) .
.
Using the ``Load'' button, the user selects an arbitrary test image from disk
and the system then loads and processes it. The test image is then shown in
the top left of the video output window (see Figure ![[*]](http://vismod.www.media.mit.edu/vismod/support/latex2html-98//cross_ref_motif.gif) ) with
the locations of the eyes, the nose and the mouth labelled. The identity of
the face is then recognized and the best database matches are shown ordered
from left to right and top to bottom. Additionally, the distance from each
match to the input face is shown superimposed on the matches. The image with
the minimum distance to the probe, (the one to the immediate right of the
probe image) is the best match found in the system's database.
) with
the locations of the eyes, the nose and the mouth labelled. The identity of
the face is then recognized and the best database matches are shown ordered
from left to right and top to bottom. Additionally, the distance from each
match to the input face is shown superimposed on the matches. The image with
the minimum distance to the probe, (the one to the immediate right of the
probe image) is the best match found in the system's database.
The user can also choose to run the algorithm on any one of the images shown
in Figure ![[*]](http://vismod.www.media.mit.edu/vismod/support/latex2html-98//cross_ref_motif.gif) by selecting the number corresponding to it
(``0'', ``1'', ... ``8'' which identify the images from left to right and top
to bottom in the figure). Also, the user can select ``Randomize'' to replace
the images in Figure
by selecting the number corresponding to it
(``0'', ``1'', ... ``8'' which identify the images from left to right and top
to bottom in the figure). Also, the user can select ``Randomize'' to replace
the images in Figure ![[*]](http://vismod.www.media.mit.edu/vismod/support/latex2html-98//cross_ref_motif.gif) with a random sample of the images in
the database to quickly view some faces in the database.
with a random sample of the images in
the database to quickly view some faces in the database.
By clicking on the ``Recognize Video'' button, the user can utilize the video
camera and frame grabber to capture data directly from the current scene, as in
Figure ![[*]](http://vismod.www.media.mit.edu/vismod/support/latex2html-98//cross_ref_motif.gif) . Here, the user's own face has been localized and
the closest match in the database is presented. In this case, the user is not
in the database so the closest match is the member of the database that most
closely resembles the user. Finally, the user can add a new face to the
database by selecting the ``Save'' button. The user is then prompted to enter
a name identifying the individual in the test image. Thus the database can be
easily manipulated by the user who can train the system and customize it for
the set of individuals to be recognized.
. Here, the user's own face has been localized and
the closest match in the database is presented. In this case, the user is not
in the database so the closest match is the member of the database that most
closely resembles the user. Finally, the user can add a new face to the
database by selecting the ``Save'' button. The user is then prompted to enter
a name identifying the individual in the test image. Thus the database can be
easily manipulated by the user who can train the system and customize it for
the set of individuals to be recognized.